Who doesn’t love the feeling of freshly manicured nails? It’s a small luxury that can brighten your day and boost your confidence. However regular salon visits can be costly and time-consuming. Thankfully, with a little know-how, you can achieve a professional-looking manicure from the comfort of your home.
In this guide, I’ll walk you through everything you need to know to master a DIY manicure, from preparation to polishing, and a few extra tips for lasting results. What are gel overlay nails? Check out their page to learn more.
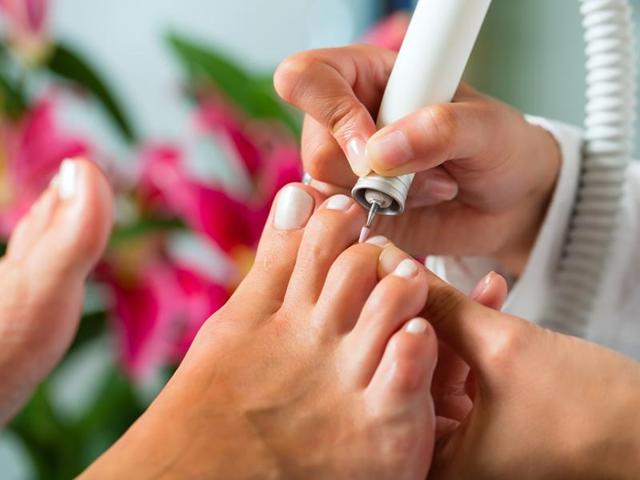
1. Gather Your Tools
Before starting, it’s essential to have all your manicure tools ready. Here’s a list of must-haves for a perfect at-home manicure:
- Nail file and buffer: These are for shaping your nails and smoothing the nail surface.
- Cuticle pusher: To gently push back the cuticles.
- Cuticle trimmer or nippers: To trim dead skin around the nails.
- Nail clippers: For trimming nails if needed.
- Nail polish remover: To clean off any old polish or oils from the nails.
- Cotton pads or balls: For removing polish.
- Base coat and top coat: Essential for long-lasting results and protection.
- Nail polish in your favorite shade(s).
- Hand moisturizer and cuticle oil: To nourish your hands and nails post-manicure.
Optional:
- Nail art tools or stickers if you’re feeling creative and want to add designs.
2. Prep Your Nails
The foundation of any great manicure is well-prepared nails. Start by removing any old polish with a gentle, acetone-free nail polish remover. Acetone-free formulas are less harsh and help keep your nails healthy.
Once your nails are clean, it’s time to shape them. Using a nail clipper, trim your nails to the desired length. If you’re going for a specific shape (like almond, square, or oval), use a nail file to shape the edges. Always file in one direction to avoid damaging the nail and creating splits or cracks.
Pro tip: Avoid soaking your nails in water before filing. Wet nails are weaker and more prone to damage.
3. Buff and Smooth
Buffing helps to smooth the surface of your nails, getting rid of ridges and creating a smooth base for polish. Using a buffing block, gently buff each nail. Don’t overdo it – too much buffing can thin your nails, making them weak.
4. Care for Your Cuticles
Your cuticles serve an essential purpose: they protect your nails from infection. However, overgrown or dry cuticles can make a manicure look untidy.
To care for your cuticles, apply a cuticle softener or a bit of cuticle oil. Let it sit for a minute, then gently push back the cuticles using a cuticle pusher. Be gentle here – pushing too hard can damage the nail bed.
If you notice any loose or dead skin around the cuticles, you can trim them with a cuticle trimmer. Be careful not to cut too much; trimming too far can lead to infection or bleeding.
5. Clean Your Nails
After trimming and shaping, it’s essential to clean the nails thoroughly. Using a cotton pad soaked in nail polish remover, wipe down each nail to remove oils, dust, or debris left from filing or buffing.
This step ensures your base coat will adhere properly, leading to a longer-lasting manicure.
6. Apply the Base Coat
A base coat is a crucial step in any manicure routine. It provides a smooth surface for the polish and helps protect your natural nails from staining, especially if you’re using darker colors. Some base coats also offer additional benefits like strengthening or nourishing the nails.
Apply a thin layer of base coat to each nail, and let it dry completely before moving on to the polish.
7. Time to Paint
Now for the fun part—applying the nail polish!
- First coat: Start with a thin layer of polish. Don’t worry if it looks a bit sheer—thin coats dry faster and help prevent smudging or bubbling. To apply, start in the center of your nail, close to the cuticle, and swipe the brush towards the tip. Then, fill in the sides of the nail with a few additional strokes.
- Second coat: Once the first coat is dry (about 2-3 minutes), apply a second coat for opacity and even coverage. If you’re using a lighter color, you may need a third coat, but always keep the layers thin to avoid a thick, clumpy look.
- Clean up: If you accidentally get polish on your skin, don’t worry. Use a small brush or an old eyeliner brush dipped in polish remover to clean up the edges for a professional finish.
8. Seal the Deal with a Top Coat
The top coat is essential for locking in your polish and adding shine. It also helps prevent chipping, making your manicure last longer.
Just like the base coat, apply a thin layer and be sure to “cap” the tips of your nails by brushing a small amount of top coat along the nail’s edge. This seals the polish and reduces the chances of peeling or chipping.
9. Allow Ample Drying Time
Drying your nails is often the most tedious part of the manicure, but it’s crucial for avoiding smudges. While fast-drying top coats can speed things up, it’s still important to give your nails enough time to dry completely.
Wait at least 15-30 minutes before doing anything with your hands. If you’re in a hurry, try dipping your nails in cold water for a few minutes after they’re semi-dry; this can help set the polish faster.
10. Moisturize
Once your nails are dry, it’s time to give your hands some love. Apply a rich hand cream and massage it into your hands, focusing on your cuticles. Using a nourishing cuticle oil daily can help keep the skin around your nails soft and healthy, extending the life of your manicure.
Bonus Tips for a Lasting Manicure
- Avoid hot water: Hot water can cause polish to lift or chip, so try to avoid long, hot showers or soaking your hands in water right after a manicure.
- Gloves are your friend: If you’re doing chores or working with harsh chemicals, wear gloves to protect your nails and polish.
- Touch up with a top coat: Reapplying a top coat every couple of days can refresh the shine and extend the life of your manicure.
- Hydrate your nails: Just like your skin, your nails can become dry and brittle. Regularly applying cuticle oil and hand cream will help keep them strong and healthy.
Nail Art and Finishing Touches
Once you’ve mastered the basics, you can get creative with your DIY manicures. Add some sparkle with glitter polish, or use nail art tools to create fun patterns, stripes, or dots. You can even use a toothpick or a bobby pin to create simple designs like polka dots or flowers. Nail stickers and decals are another easy way to elevate your manicure with minimal effort.
Conclusion
Doing your own manicure at home doesn’t just save money—it can be a relaxing, creative process that allows you to personalize your look. With practice and the right tools, you’ll be able to achieve salon-quality results in no time. By following these steps and giving your nails the care they deserve, you’ll have beautiful, long-lasting nails without ever leaving your house.